
You obviously want your emails to get to prospect inboxes but there is a whole world of technical factors that influence how successful you’re going to be. To make sure your emails land where you want them to, you have to focus on building the metrics that impact your deliverability. Choosing a tool that puts deliverability first, like Woodpecker, is one piece of the puzzle.
But there are many factors that affect your overall deliverability. Your domain rating and domain authority, page authority, high-quality content, your volume of organic traffic, inbound links, backlinks — all these and more which you can measure using a website authority checker and other related tools, have a strong impact on everything from the deliverability of your emails to your search engine ranking.
The performance of your email campaign is affected by the domain rating authority metric of the address from which it is sent. Achieving high deliverability goes hand in hand with a solid technical foundation of your website.
The reputations of your website, your domain and your email server IP play a tremendous role in getting messages delivered.
But do you know what actually affects your reputation? Do you know how to check the reputation, control it, or improve it? Read on to find some answers and helpful tools.
What’s the difference between domain reputation and email server IP reputation?
Domain reputation
Ok, let’s start with the basics, some of which you may be already aware of. The domain you use for sending your emails, like woodpecker.co in cathy@woodpecker.co, has a “reputation”, which depends on many factors.
Start with domain age. Among other things, domain reputation depends on how old the domain is. Age also influences general domain authority scores as well. In fact, for the first 5 days after a new domain is registered, it is by default considered as suspicious. After all, reputation is something you can only earn over time. So it’s good to warm up all the emails on such a fresh domain by sending just a few emails per day during the first four weeks after registration.
Another important factor affecting the reputation of a domain is how it’s been classified on the web (e.g. business and industry, education, finance, dating sites, or gambling). So the nature of the target audience can have an impact on domain reputation too.
See the full list of Cisco Web Usage Control Filtering Categories >>
We recommend setting up a separate domain for outbound to have better control over its reputation. You have to keep in mind, however, that a fresh domain needs about 1-2 months to earn a good reputation. That’s why you should warm up all the email addresses on the new domain before you start sending email campaigns regularly.
Improving your website’s domain rating authority metric doesn’t happen overnight. Generally speaking, it takes at least a month of regular, smallish emails sent before you rank high enough to be trusted to send more emails, more often.
This “warm up” process is key to improving your domain ranking and will let you send emails at normal levels.
How to warm up an email on a new domain
To warm up an email within a new domain, start by sending just a few emails a day. You can also improve your domain authority score by responding to some of the messages you receive at the new address.
Start with around 10 emails a day, then 20, then 30 emails a day should do it. Start sending the campaigns no sooner than after a week of warm-up.
And don’t go from 30 emails/day straight to 500 emails/day. Email providers use filters that allow them to assess the volume of email going out from your mailbox. A radical increase in the sending volume is something that alarms their anti-spam filters.
In fact, your campaigns should never include thousands of prospects. Keep them smaller but more precise, customized, and personalized. Remember that your follow-ups are also sent from the same email address. That’s why up to 50 new emails a day is enough to keep your outreach going smoothly.
There’s no need to ruin progress you make toward a better domain rating score by moving too far, too fast.
The better the reputation of your domain, the higher the deliverability of your emails. That’s why it’s important to have it checked and fix all the issues that may weaken it before you start serious outreach. With your domain authority calculated, you can move forward with confidence, knowing that you have the domain score needed to conduct your email outreach properly. More about tools to control the reputation score of your site and your domain later in this post.
Server IP Reputation
Except for the domain reputation, there’s also the reputation and authority of your email server IP. This depends very much on your email service provider.
If you send your messages using an email provided by Google, you will be assigned an IP from Google. If you use a mailbox created on your host server (you don’t use Google, but have an SMTP and IMAP configured on your server), you will be assigned IPs from the server host (e.g. GoDaddy).
Sometimes, the IPs you get from your email provider or from your service provider have already some kind of reputation – but it can be a good one or a bad one. That’s why it’s crucial to check your email server IP before you start sending.
How do I know what my email server IP is?
Our Customer Success team at Woodpecker use and recommend an awesome tool called Mail-Tester. It allows you to easily check if your email may look “spammy” to other email servers. You can check up to three messages a day for free. Among other things, the tool will also show you the server IP from which your email was sent. Here’s how to use it:

- Go to mail-tester.com.
- Copy the email address they’ve generated for you.
- Send the email you want to test to this address. Make sure you don’t send just anything, but your actual email copy, because Mail-Tester checks the full content of your email, not only your email server settings.
- Once you’ve sent the email, go back to mail-tester.com. You should see the score of your email in seconds there.
Here’s what you’ll get:
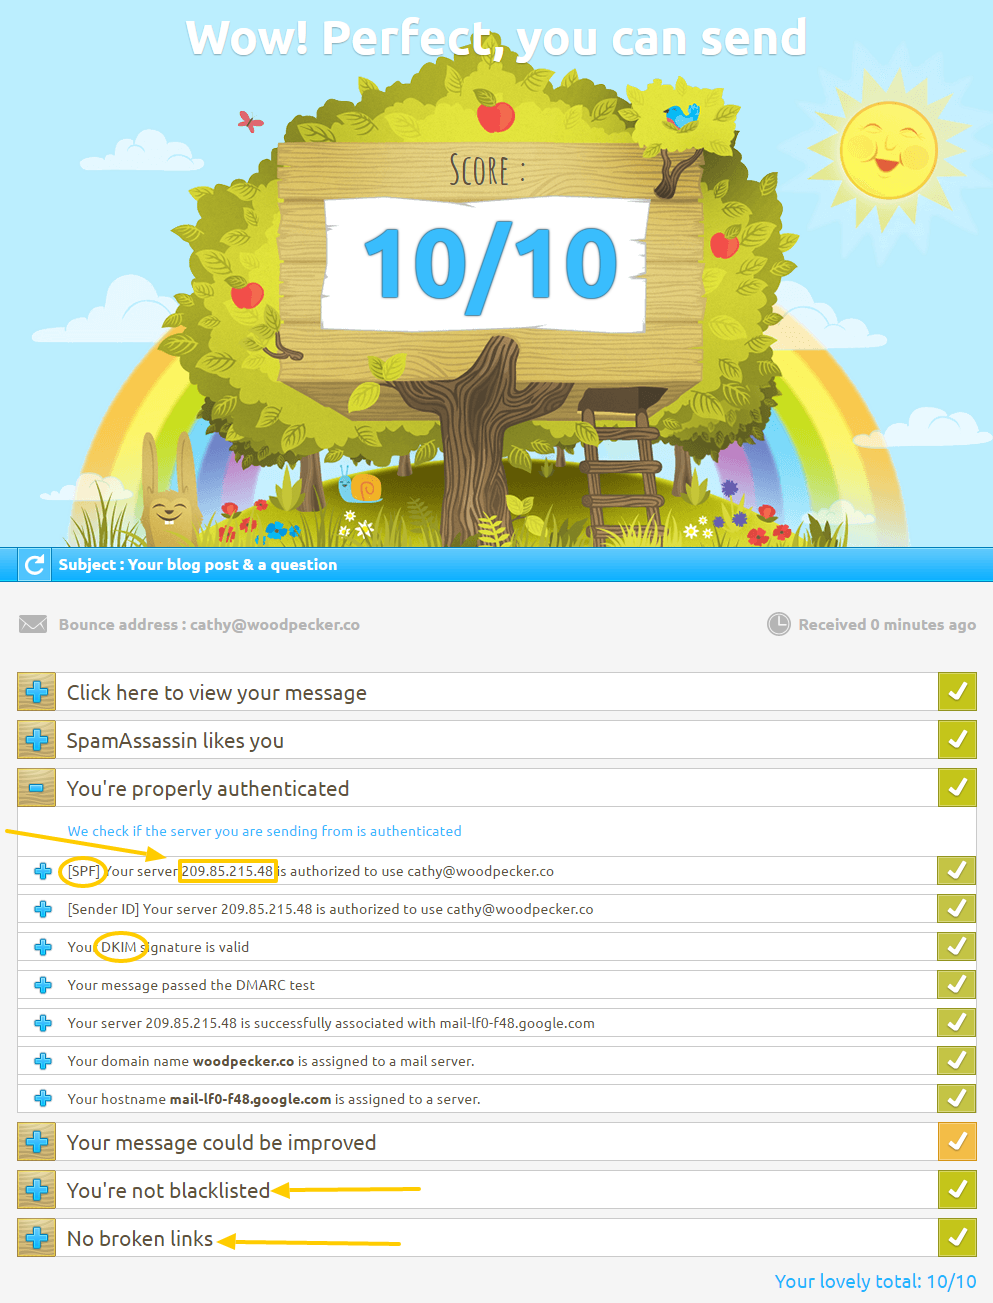
The number I’ve marked with the orange rectangle frame is your email server’s IP. The tool will also inform you whether your SPF and DKIM (marked with circles) are properly set up or not, which is also crucial for your sender reputation and thus your deliverability. Moreover, it will show you some hints on improving the content of your message, notify you if you’ve been blacklisted and tell you if your message contains any broken links.
A little personal note here: Be careful with the links, I had three broken links in my signature (because I foolishly pasted a piece of HTML in my signature settings, and some parts of it were wrongly decoded by my email client. And I didn’t even check if the links were working or not!), and that costs -0.5 for EACH broken link in the spamminess assessment. So make sure to test out even the most obvious things that you would never suppose may cause any trouble.
A little technical note: If you’re sending from an email address set on Google, you are granted one of the IPs from their pool. So it may be the case that even though you’re sending from the same address, you may see a different IP in Mail-Tester each time you test a message there.
How to interpret the reputation score you get
- Obviously, the closer you get to 10, the better. 10 should be the goal you pursue and fight for.
- 9-8 is a good score, but take all the hints Mail-Tester gives you into consideration to improve.
- 7-6 is acceptable, but some strictest providers may block some of your emails.
- You should never go with 5 or below.
How to check your domain reputation & email reputation
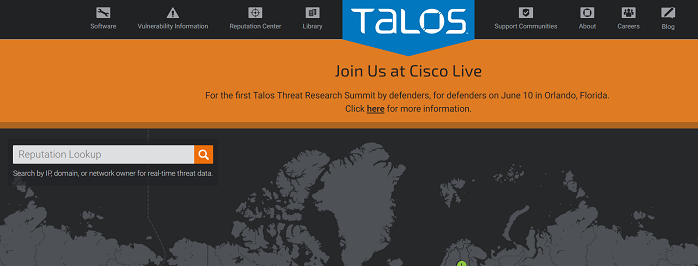
Once you know your IP, you can use another tool to check its reputation. It’s called Talos and it’s one of the tools provided by Cisco. This tool allows you to enter your email server IP or your domain to check the reputation of both domains.
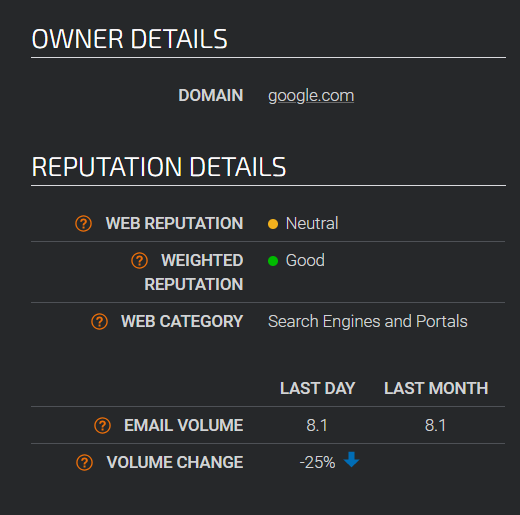
You will learn if the reputation of your domain or IP is assessed as Good/Neutral/Poor by other email service providers. This is crucial. You want “Good”, of course. “Neutral” should give you a sign that there’s something you can improve and needs further investigation. “Poor” means that most of your emails won’t get to their destination.
How to improve your IP reputation
If your IP reputation is poor, the most reliable solution would be to just change it. The damage may be too great to repair and not worth the time and trouble anyway. You might be able to achieve higher scores by starting over. You can do that by setting up a new email address and working on a good reputation of the new one (warm it up!). If the IP’s reputation is neutral, you can try to improve it by optimizing your sending workflow.
The first thing you can change is to make sure you don’t send too many emails in a short time. Try to make the flow more steady and without concentrated bunches of emails.
And that brings us to the next factor you can insights about from Talos: sending volume history. This should be stable, like in the graph below.
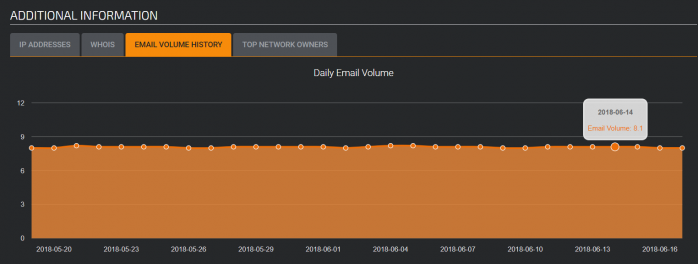
If your IP was used to send a huge number of emails in a short time, you’ll see some peaks on the graph. Such peaks look suspicious to email servers and they will negatively affect the reputation of your email server IP.
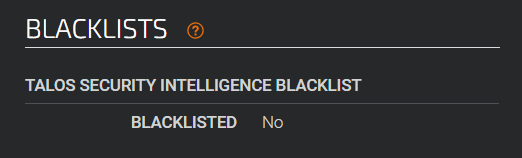
And finally, Talos will show you if your IP was added to any blacklists. If you are unlucky enough to discover this about your IP, you have a difficult road ahead.
If you’re listed on a blacklist somewhere, you have to contact the manager of the list and ask about their unlisting process (what to do to get off the list). Sometimes you just need to prove you’re not a bot. Sometimes, they require you to send them a message with an unlisting request.
If you find yourself in this situation, you may just consider starting over with a new IP.
How to improve your domain reputation
A high domain authority score is priceless and needs to be protected. If, however, you learn that your domain rating has been damaged or downgraded, here’s what you should do.
First, you should pause all running campaigns and start investigating what affected your deliverability. It might have been a spammy email copy or too many bounced emails. Once you find out what the reason was you can start working on improving your domain reputation and make it good again.
The process starts with sending just a handful of emails to the contacts you know and asking them to reply to you and move your emails from their spam folders to their main inboxes. Continue exchanging emails until the reputation goes back to normal.
Here’s the process explained in more detail: A Step-by-Step Guide to Regain a Good Domain Reputation >>
Or you can also watch a video with Julia, Head of Support at Woodpecker, who explains how to recover your domain’s reputation:
What’s in it for you?
If you’re taking your outreach seriously, the domain and email server IP reputation are crucial security factors to take care of. Neglecting them means asking for the kind of trouble that can seriously hurt your outreach activities. Your email account might get blocked and your domain may get blacklisted. If that happens, even the best emails won’t get to your prospect inboxes.
It’s important to keep in mind that your sender reputation is something you can control. Remember those two tools: Mail-Tester and Talos. Check them out and see what kinds of insights they can provide about your domain authority. Have your domain and IP(s) checked as soon as possible.
It’s especially important if you’re automating your email campaigns with tools like Woodpecker. The IPs that initiate the sending process on our side are constantly monitored for their impeccable reputation. But as you directly integrate your SMTP (sending email server) with Woodpecker, the reputation of your domain and IP(s) has a greater effect on the deliverability of your cold email campaigns.
Remember that maintaining high quality and IP reputations holds the key for email deliverability performance and for other important metrics like search engine result pages, your Google ranking and the overall visibility of your web page.
For more information about deliverability, you can check:
- Our Deliverability 101 ebook>>
- The Ultimate Guide to Email Deliverability by Validity (formerly Return Path) >>
- Answers to 8 Frequently Asked Email Deliverability Questions >>
FAQ Section
1. How is domain reputation calculated, and why is it crucial for email deliverability?
Domain reputation is calculated based on several factors, including the volume of emails sent from the domain, the rate of spam complaints received, engagement rates (such as opens and clicks), the presence of the domain on various blacklists, and the history of the domain’s email sending behavior. Internet Service Providers (ISPs) and mailbox providers use this reputation to decide whether to deliver emails to the recipient’s inbox or spam folder. A good domain reputation ensures higher email deliverability rates, meaning emails are more likely to reach the intended recipients’ inboxes, while a poor domain reputation can lead to emails being blocked or filtered into spam, significantly impacting the effectiveness of email campaigns.
2. What impact do IP addresses and domain reputation have on each other, and how can they affect your email marketing efforts?
IP addresses and domain reputation are closely linked in affecting email marketing efforts. A domain’s reputation can be influenced by the behavior of the IP addresses it sends emails from. If an IP address is associated with sending spam or has been used for malicious activities, it can negatively impact the domain reputation. Conversely, a domain known for sending high-quality, engaging content can help improve the reputation of the IP addresses it uses. Managing both IP and domain reputation is crucial for maintaining good email deliverability. Using dedicated IP addresses for email campaigns and monitoring their reputation through tools like Google Postmaster Tools can help in isolating and addressing issues that might affect email marketing performance.
3. How can Google Postmaster Tools help in managing your domain’s reputation for better email campaign results?
Google Postmaster Tools provides valuable insights into the health and reputation of your domain from the perspective of Google’s email services, including Gmail. It allows senders to monitor data on spam complaints, IP reputation, domain reputation, and feedback on authentication issues. By analyzing this information, senders can identify potential problems affecting their email deliverability, such as being flagged by spam traps or experiencing a sudden increase in spam complaints. Armed with this knowledge, businesses can make informed adjustments to their email campaigns, such as improving content quality, list hygiene, or authentication practices, to maintain a positive domain reputation and enhance email campaign results.
4. What strategies can be employed to improve a bad domain reputation and avoid email deliverability issues?
Improving a bad domain reputation involves several strategic actions:
- Regularly clean your email list to remove inactive or unresponsive addresses and avoid hitting spam traps.
- Implement authentication protocols like SPF (Sender Policy Framework), DKIM (DomainKeys Identified Mail), and DMARC (Domain-based Message Authentication, Reporting, and Conformance) to verify your emails’ legitimacy.
- Gradually increase email volume if you’re starting with a new domain or IP address to avoid being marked as spam (a practice known as “warming up” your domain).
- Encourage engagement by sending relevant, valuable content to your subscribers, as positive interactions can boost your reputation.
- Monitor feedback loops with ISPs and mailbox providers to identify and address issues promptly, such as unsubscribing users who mark your emails as spam.
- Use a reputable email service provider that offers tools and guidance for managing domain and IP reputation effectively.
5. Why is the age of a domain important for domain reputation, and how does it influence email deliverability?
The age of a domain contributes to its reputation because older domains are generally perceived as more trustworthy by ISPs and mailbox providers. A domain that has been active for a longer period is likely to have established a sending history, which can be evaluated for consistency and reliability. New domains, on the other hand, lack this history and are often scrutinized more closely for spam-like behavior. Therefore, an older domain with a positive sending history and good email practices can influence email deliverability positively, as it’s more likely to be trusted by email service providers, leading to better inbox placement rates for email campaigns.