
It’s my pleasure to announce that we’ve just rolled out LinkedIn manual tasks. They’re available for all users of Woodpecker Sales Assistant.
As of now, you can get easy access to your prospects’ LinkedIn profiles and make LinkedIn outreach easier by adding LinkedIn manual tasks as steps in your campaigns.
You can still set up regular manual tasks, e.g. to make a phone call to a prospect in between other steps.
Tasks in Woodpecker help you increase your chances of closing deals, allow you to better organize your workflow, and manage prospects. And as of now – they also make reaching out to prospects on LinkedIn easier.
Without further ado, let’s see how they work, how you can use them in your outreach process, and how LinkedIn manual tasks are different from regular manual tasks.
What are Tasks in Woodpecker?
Tasks in Woodpecker are additional steps that you can schedule in your campaign, besides emails. They’re manual actions that you want to include within the campaign flow, e.g. reach out on LinkedIn, make a phone call to a prospect or update their data.
Before we’ve launched this feature, you could’ve built your campaign with an opening email and as many as 11 follow-ups, to which you could set certain conditions.
With manual tasks, you can design a more advanced campaign structure, containing emails and manual to-dos that make your flow smoother and easier. To both of these you might set conditions.
LinkedIn manual tasks are a LinkedIn-based version of that – they help you to perform LinkedIn-related actions within your campaign.
You might say they’re an upgrade on the Woodpecker campaigns as you know them, that boosts the chance of closing deals on LinkedIn and helps you get better organized in your daily workflow.
They work a bit different than regular Manual Tasks, though.
How do LinkedIn tasks and regular tasks work?
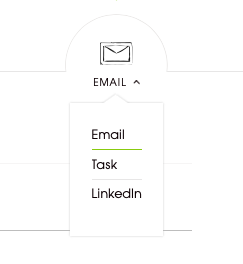
One change that you see now when creating a campaign is that you can choose between three types of steps: emails, regular tasks, and LinkedIn tasks.
A regular manual task can be whatever you set for yourself. It’s a step that serves as a reminder to perform an action at a certain stage in a campaign.
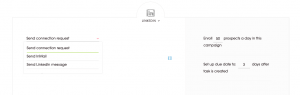
With LinkedIn manual tasks, however, you can choose between three actions:
- send connection request
- send InMail
- send LinkedIn message
For each of the options, you can still add a note in the content field, e.g. the message you want to send to your prospects on LinkedIn.
You can use snippets for personalization, just like you would with email or a regular manual task. Once the campaign is active, they will be replaced with data from your spreadsheet, so you can then just copy the message and paste it in a LinkedIn message.
Adding prospects’ LinkedIn profiles
If you add a link to a prospect’s LinkedIn profile in the PROSPECTS table, you’ll see “View LinkedIn profile” in the task.
You can add the link by:
- using Woodpecker’s native integration with Hunter
- importing the data from Google Sheets (also natively integrated with Woodpecker) – if you have such data in your spreadsheet
- using LinkedIn Lead Gen Forms + Woodpecker integration (via Zapier)
If you’ve added a LinkedIn manual task in your campaign, but the link to one of the prospects’ LinkedIn profile is missing, you’ll see “Find LinkedIn profile” in the task.
Woodpecker can generate a link to LinkedIn’s search, using the prospect’s first and last name, as well as the company from the PROSPECTS table.
It will also be able to generate such a link using only the prospect’s first and last name, but the search results will be much more likely to show the right person if the company field is filled as well.
If you’ve set a LinkedIn task, but either the first or the last name of a prospect is missing, you’ll see a notification in the TO-CHECK tab (unless you included the link to their LinkedIn profile in the spreadsheet).
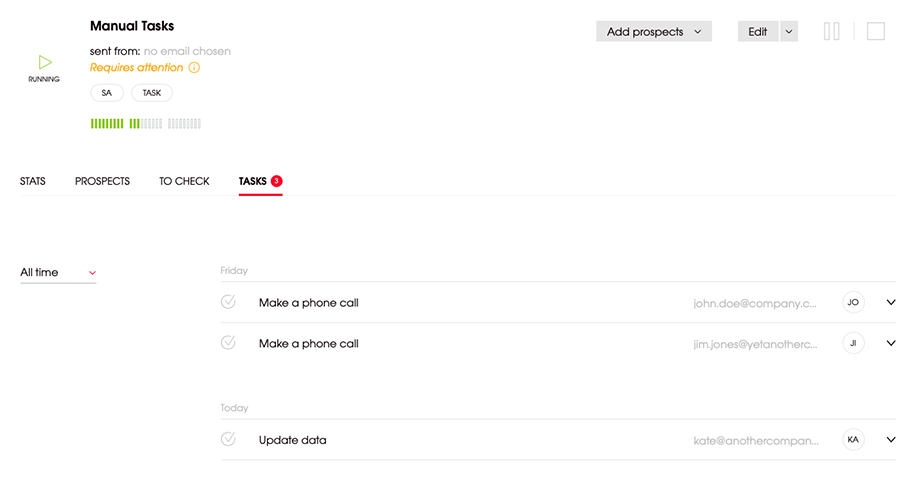
Tasks tab & state
You can see all your tasks in the Tasks tab. If you need to take some action, you’ll see a red circle with the number of tasks that require your attention.
You can filter tasks by their state.
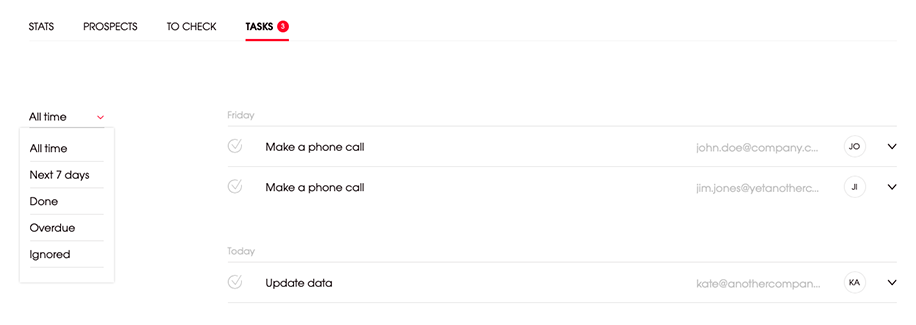
A task can have one of these 4 states:
- To do – the task has been created and is “waiting” to be done
- Done – the task has been completed
- Ignored – the task has been intentionally ignored
- Overdue – the due date has passed, but the task has neither been completed nor intentionally ignored
The only way a state can change is if you do it manually.
When a task’s due date is approaching, you’ll get a notification in the Tasks tab. You’ll also see “Attention required” on your Campaigns list, in the campaign that has a task to be completed soon.
Adding conditions to tasks
If you set a condition after a task, its state will affect how Woodpecker sends your follow-ups after that task. This works the same for regular manual tasks and LinkedIn manual tasks.
- Marking a task as done will trigger Path YES
- The ignored state will trigger Path NO
- The to-do state won’t trigger any of the Paths. The prospect’s status will still be active, and one of the Paths will be triggered only when you change the task’s state to done or ignored
Now let’s see what an actual campaign with tasks might look like.
Log into your Woodpecker account or start a trial if you’re not a Woodpecker user.
How to create a campaign with tasks in Woodpecker?
As I already mentioned, now apart from manual tasks you can also add LinkedIn tasks to make your outbound outreach easier across channels. So what could creating such a campaign look like?
#1 choose Step 1 – the opening email
When adding a step, choose from the dropdown menu above the subject line.
In this scenario let’s say we’re picking an email as Step 1, but you can also start your campaign with a task – either type. Or build a campaign with tasks only, with no emails at all.
You can add as much as 12 steps to your campaign – and it’s up to you how many of them are emails, and how many are tasks.
#2 choose Step 2 – a manual task
This time choose a task instead of an email from the dropdown menu.
Let’s say the action you’d like to add at this point in the campaign is to call your prospect.
Set up the wait window between the email and task, e.g. for 3 days (if the prospect doesn’t respond within these 3 days, the task will be created).
Then write a reminder to make a phone call in the content field of your task – and set the due date for this task on the right of your note.
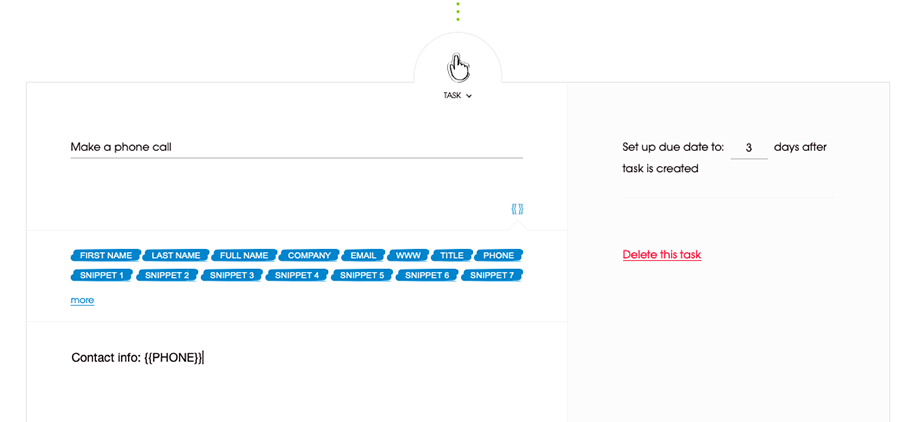
You may use snippets in your tasks – for example, with the prospect’s phone number so you can call them right away, without having to look for the number in a spreadsheet.
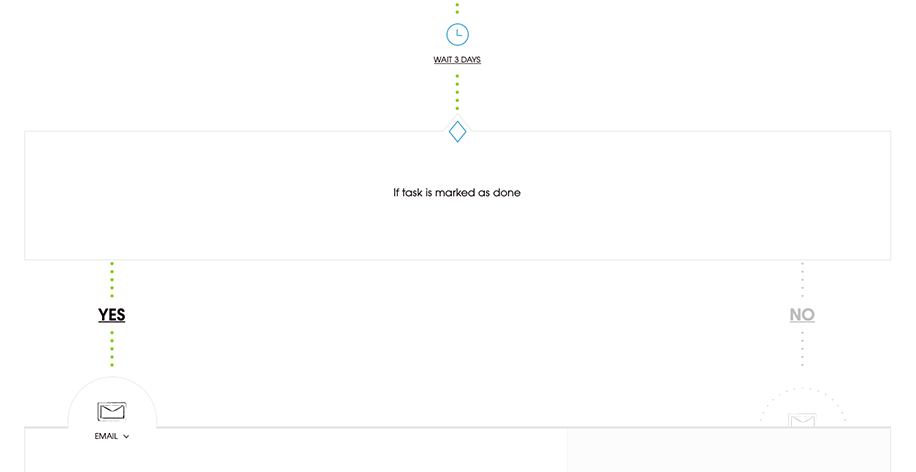
#3 set a condition to the task
You can set conditions to your tasks, too – just like with emails.
- If you get a hold of your prospect and mark the task as done, the Path will divert into Path YES, which might be e.g. a follow-up message with an offer.
- If you couldn’t reach them, you can mark the task as ignored, and the Path will divert into Path NO, which might be an email saying “Hey, I was trying to reach you…”, or a LinkedIn connection request.
If you don’t mark the task as done or ignored, it won’t trigger any of the possible next steps.
If you set up a follow-up email to be sent 3 days after a task, the message will be sent 3 days after the task is marked as done or ignored, not 3 days after it’s been created.
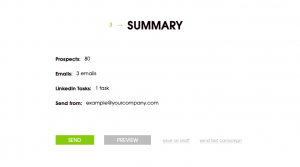
After you’ve added prospects to your campaign, you can see a summary of what kind of steps and how many of them you have in your sequence.
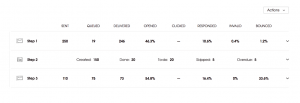
What do the stats look like now?
You’ll see slight changes in the way we present your stats. Apart from emails, you’ll get to see how many tasks were created and how many of each state there are in a sequence.
Over to you
Curious what results LinkedIn tasks can bring you? Sign up for a free trial and try them out>>