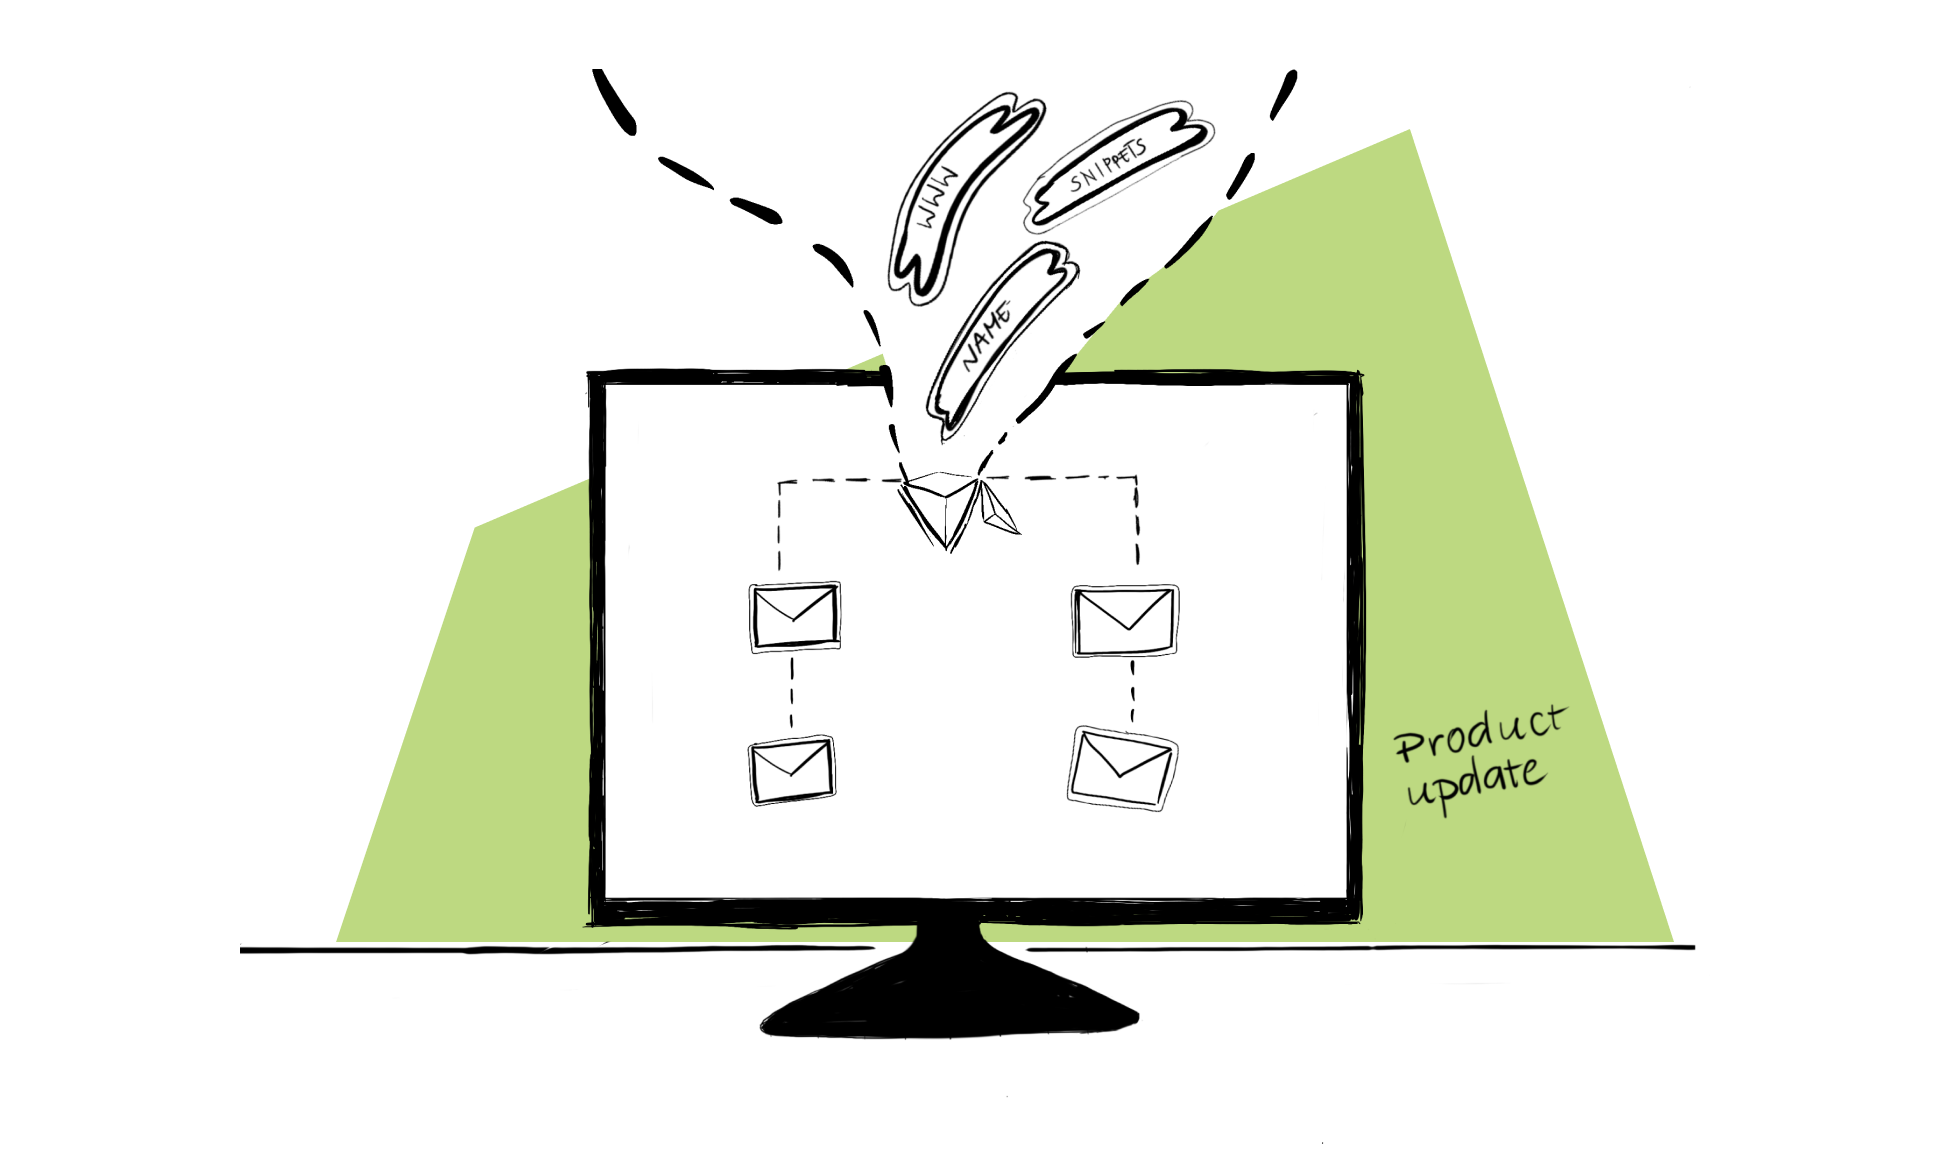
Today I’d like to share some exciting news with you. We’re releasing a new campaign model that will allow you to send follow-ups triggered by the action your prospect takes to add even more personalization to your campaigns.
If-campaigns, as the new model is called, are now available for all users. Let me explain to you how they work and what a breakthrough they are for your follow-up strategy and email deliverability.
What are If-campaigns?
Until now your campaign in Woodpecker could only take one path: the opening email was followed by a pre-scheduled sequence of follow-ups until a response from a prospect was detected. All the prospects within the same campaign were receiving the same follow-up messages, no matter whether they opened the email more than 3 times or didn’t open it all.
Your prospects’ level of engagement with your message makes a difference from a strategic point of view, though. Those who didn’t open your email should be approached in a different way than those who opened it a couple of times. Both groups require different communication to hit the right note and encourage them to get involved in a conversation.
That inspired us to create If-campaigns in Woodpecker. Let’s see what they’re about.
How do they work?
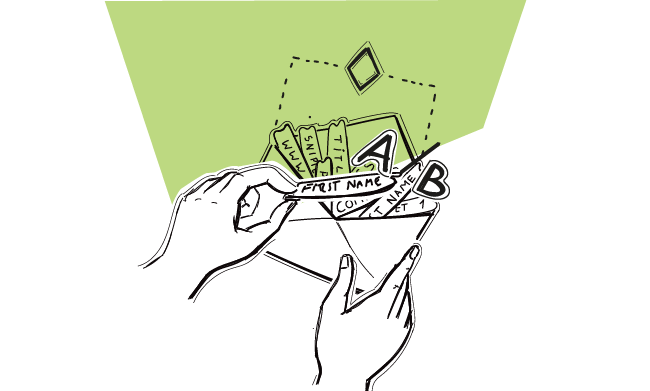
If-campaigns allow you to prepare two versions of a follow-up and define a trigger action that will ping Woodpecker to send a respective message. That trigger action takes the form of a Condition. One follow-up will be sent if the Condition is met, or in other words, when a prospect takes a specific action, and the other one in the opposite case.
For now, there are 4 Conditions you can choose from:
- your email has been opened more than X times,
- your email has been opened,
- a prospect has clicked on a link in your email copy,
- a prospect has clicked on a link in your email copy more than X times.
In short, it means that your campaign can now take two Paths according to the prospect’s behavior. By applying the condition, you can better adjust the follow-up email content to the prospects’ level of engagement.
Plus, it gives an additional boost to your email deliverability, your email copy is more varied and nuanced. Having an If-campaign plus the following 14 deliverability checks will make it easier to get your emails to the main inbox.
That’s it for the theory. Time to see how the If-campaigns look like in practice.
How do they look like in the app?
Creating the If-campaigns comprises of three steps:
- Creating the Path
- Adding Prospects
- Sending the Campaign
Let’s go over each step in more detail now.
STEP #1 The Path
The Path begins with the opening email.
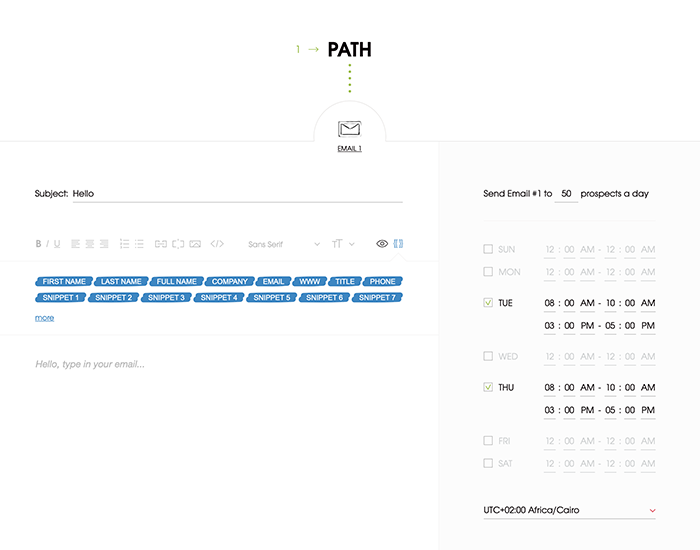
Delivery time set-up
Now let’s take a closer look at the delivery time set-up. We’ve added the option to choose up to three windows a day when your emails will be sent out. To add a time slot you need to click the ‘+’ symbol right next to the day of the week name.
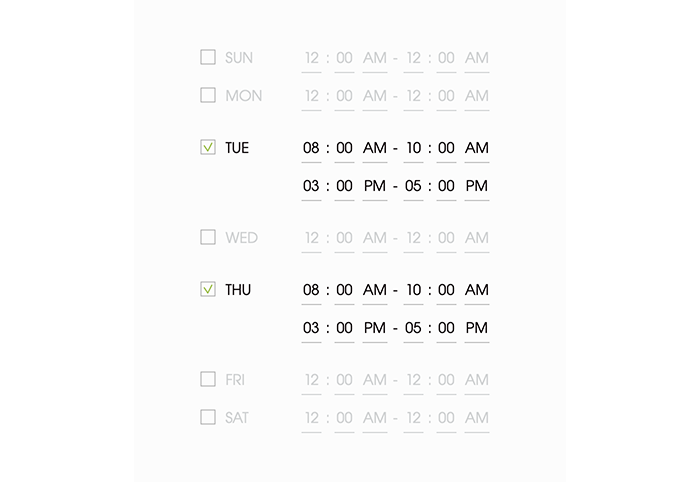
Adding up to three windows allows you to get your email delivered right when your prospects tend to check their mailbox. If you know they usually do it in the morning, during lunchtime and right before 5 p.m. you can cover all three time-slots and increase the chance that your message will arrive just in time and will be noticed.
The Condition
Here’s where your campaign Path may split into Path YES and Path NO. The Condition defines a prospect’s action that determines what message should be sent next.
As I already mentioned, there are two Conditions to choose from:
- if a prospect has opened an email more than X times
- if a prospect has opened an email.
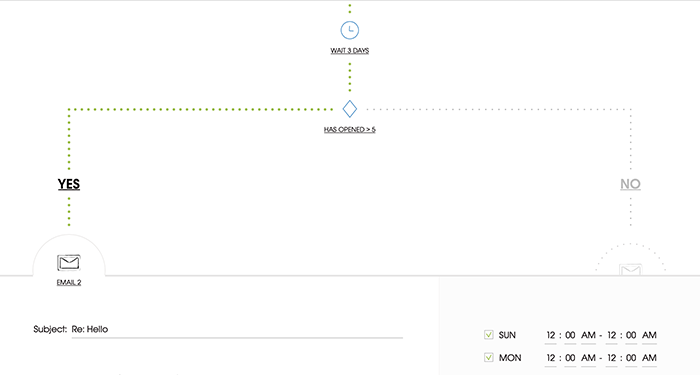
Once you choose the Condition, you can create two follow-up sequences. For example, if you set your Condition to “If a prospect has opened an email more than 2 times”, you can create one follow-up that will be sent when the answer is YES (that is, the Condition has been met), and the other one that will be sent when the answer is NO (so the Condition hasn’t been met).
Setting up a Condition is optional, though. You can skip this step if you want.
STEP #2 Prospects
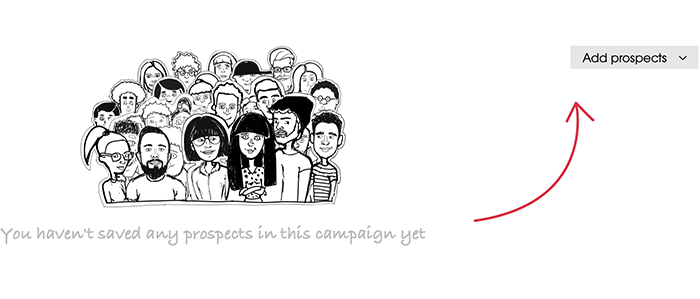
Here nothing has changed. Adding prospects to your If-campaign is as straightforward as it was. You can add them manually, from your database, or import from a CSV file.
STEP #3 Sending
Once your If-campaign is ready to be sent, you can preview it by clicking the ‘Preview’ button.
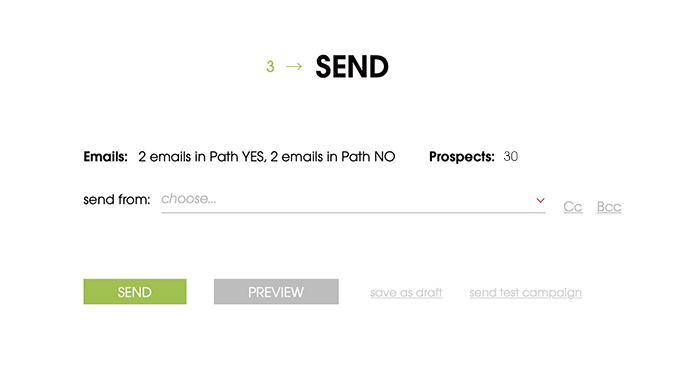
First thing you can see in the preview is the outline of your If-campaign, as in the example below:
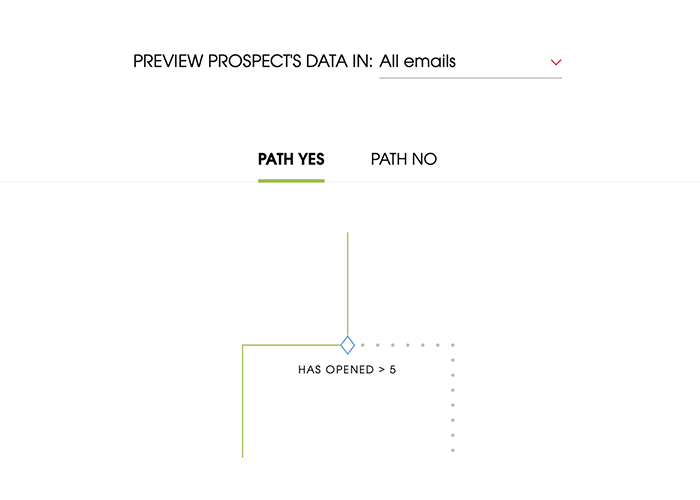
Notice that when Path YES is underlined in green and also marked in the outline, you will see emails from this path only. The blue rectangle symbolizes the Condition. Similarly, when you click ‘Path NO’ you’ll see emails from this path. It should be underlined in blue and marked in the outline.
Below the outline, you can see a preview of your opening email and all the follow-ups in both Paths.
What about the new stats view?
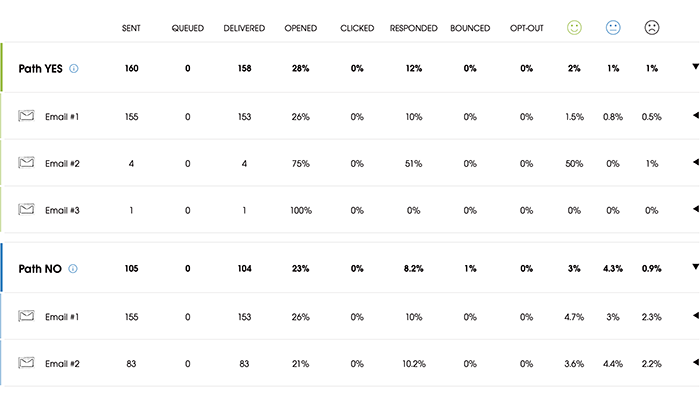
You can monitor and analyze the stats of individual follow-ups within each Path and compare their performance to identify what works best.
A guide to creating your first If-campaign
Let’s set up your first If-campaign together. Before we start, log in to your Woodpecker account. If you don’t have an account yet sign up for a trial.
Watch this short explainer clip to show you how to set up an If-campaign step by step:
What’s next?
If-campaigns take email personalization to the next level. You can now better adjust your communication to your addressees’ level of interest and engagement. Additionally, you get a deliverability boost.
We intend to widen the condition choice in the future, so your follow-ups will correspond to the recipients’ behavior even more. I can also slightly lift the veil of secrecy and tell you that the If-campaigns are an entry point for something bigger we have in plans. Stay tuned!
READ ALSO
Setting an If Before a Campaign: Connect with Two Prospect Groups Within One Campaign
Want to contact CEOs and Marketing VPs with a personalized flow, tailored to each of the groups? Prospects from your and other countries?
What We’ve Figured Out about Optimal Time for Cold Email Delivery: Vol. 2 Different time zones
The issue of different time zones complicates the definition of optimal email delivery time. What is 7 AM to our prospect in California is 4 PM for us in Poland. Many companies like ours have been prospecting overseas by sending cold emails. In such a case, should we aim at the optimal time on our prospects' clock? Or should we consider our own office hours, so that we can react quickly if someone responds to our message?

Why Should You Always Send Follow-up Emails?
Many cold email senders seem to think that a great opening message is what you need to master the outbound email outreach. Well, it is indeed – but it’s also not enough. Follow-up emails to those who didn't respond to our initial message are a must if we think of a truly effective cold email campaign. Here's a kind of 'Follow-up 101': why follow-up is so important and what we should realize before we start sending it.

