The right tool, a solid plan, and just a few clicks. That’s all it takes to start scheduling your emails and sending them automatically. At the perfect time, without any manual effort.
Scheduling emails doesn’t just save you time – it helps improve your results and, most importantly, keeps you from the consequences of forgetting to hit “send.”
This guide will walk you through the steps to schedule emails on popular platforms like Gmail, Outlook, and Apple Mail. You’ll also learn about key tools to make the process easier, common mistakes to avoid, and myths surrounding this topic so you can separate fact from fiction.
Let’s explore how you can make email scheduling work for you.
Benefits of scheduling emails

Scheduling emails brings benefits to professionals, marketers, and everyday users. Here’s why they love it.
Timely communication with recipients
Scheduling gives you control over when emails land in your recipients’ inboxes. You can send emails at the right time for maximum impact. For instance, on Monday mornings, to improve response rates in professional settings.
Higher open rates and engagement
With scheduled emails, you reach your audience when they’re most likely to check their inbox. Your message can be seen at the best possible time across the globe. In this way, you enhance open rates and click-through rates.
Improved time management
Like using time tracking software, scheduling emails helps you manage your time better. Write multiple messages and set them to send over days or weeks. This lets you focus on other tasks while emails go out at the perfect time. It also prevents last-minute rushes.
How to schedule an email in Gmail
Gmail provides a user-friendly email scheduling feature on both desktop and mobile apps. You can schedule messages at specific times and dates without needing third-party tools.
Gmail – Desktop
- Draft your email. Click the “Compose” button to open a new email message. Enter the recipient’s email, subject line, and email body.
- Schedule. Instead of clicking the “Send” button, look for the small arrow next to it. Click on it and select “Schedule send.”
- Choose a date and time. Gmail provides a few default options, like “Tomorrow morning” or “Monday morning,” but you can also set a specific date and time by selecting “Pick date & time.”
- Confirm. After selection, click “Schedule send.”
Your scheduled emails are in the “Scheduled” folder on the left panel.

Gmail App – Mobile
- Start a new email. Access your Gmail account. Tap the “Compose” button.
- Enter details. Add the recipient, subject, and content.
- Schedule the email. Click on the three vertical dots (usually located in the top-right corner), then tap “Schedule send.”
- Select a date and time. You can choose a preset time, such as “Tomorrow afternoon,” or input your details. Then, approve the changes.

If you need to cancel scheduled emails or change the delivery date, open the “Scheduled” folder. Click on the scheduled email, and – for example – choose “Cancel send” to stop it.
How to schedule an email in Outlook
Outlook’s scheduling feature is particularly useful for business users. Here’s how you can schedule emails in this system.
Outlook – Desktop
- Enter email information. Click “New mail” to compose. Include the recipient’s address, subject, and message body.
- Set the delivery time. Find the small arrow next to the “Send” button. Select a specific time for delivery.
- Save and send. Accept your options. The email will stay in the “Outbox folder” until the scheduled time.

Outlook – Mobile
- Open the Outlook mobile app. Access your account and tap “New Mail.”
- Compose the email. Enter the recipient’s information, subject, and body.
- Set the scheduled time. Instead of choosing the blue arrow (Send) at the bottom of your screen, click on the icon nearest it on the left. It’s an arrow with a clock.
- Schedule. Pick one of the given options or put your details. Hit “Send” to finalize your choice.

If you want to make changes, go to the “Outbox” folder and find the email you want to modify. You can delete it or adjust it.
How to schedule an email in Apple Mail
Scheduling emails in Apple Mail is also easy.
Apple Mail – Mac
- Open the app. Find the app on your Mac.
- Compose. Click “Create” in the Mail toolbar.
- Fill in the information: the address, subject, and message body.
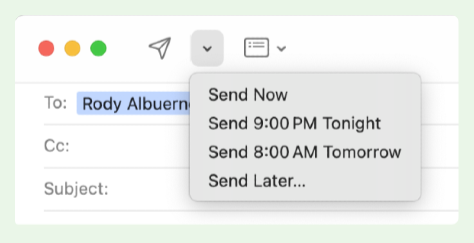
- Schedule. Next to the “Send” button, there is an option that lets you plan the sending of a message. Click it and choose the variant suitable for you. Confirm your choice.

Apple Mail – Mobile
- Open the Mail app and create an email. Find your app and click the “Create” button in the bottom right corner.
- Complete the data. Enter all necessary information as usual – subject, recipient address, and email body.
- Set a scheduled time. Hold the blue arrow button. It is located in the upper right corner. Options will appear that will allow you to schedule the sending of an email.
- Choose and save. Make your choice, check if everything is right, and accept.

If you want to make a correction, you will find a scheduled email in the “Send Later” tab.
Best practices for scheduling emails
Now, take a look at the best ways to schedule your emails for maximum impact. We have collected many hints. Some are obvious and just need reminding, and others offer a fresh approach. Here they are.
Timing your emails for maximum engagement
Consider sending emails at times when recipients are likely to be online.
- Monday or Tuesday morning around 9-10 AM tends to yield higher open rates.
- If possible, avoid scheduling emails on weekends, as engagement rates are often lower.
- Experiment and track. Track open rates and optimize based on what works best for your audience.
Write effective subject lines
The subject is crucial for capturing attention and driving engagement. Here are tips for effective lines:
- Be clear and concise. State your purpose in the subject directly.
- Use phrases like “Today only” or “Limited time” to encourage immediate action.
- Add a personal touch, like the recipient’s name, as it can increase open rates.
Use templates
Save commonly used templates in the drafts folder for recurring messages to streamline your scheduling process. Templates also keep messaging consistent.
Common mistakes to avoid with scheduled emails
If you don’t want to fall into popular traps when planning your messages, then:
#1 Don’t forget to cancel scheduled email
If plans change, don’t forget to cancel scheduled emails that no longer need to be sent. They are easy to find in the right folder, regardless of the app.
#2 Don’t overlook time zone differences
Always account for the recipient’s time zone, especially if you’re scheduling emails internationally. Then, your emails will arrive at an optimal time for the recipient’s location.
#3 Don’t send scheduled messages without proofreading
Proofreading prevents troublesome situations from occurring, such as sending emails with typos or missing attachments. Even the smallest mistake can affect your professionalism and credibility.
The top choice for email scheduling & more
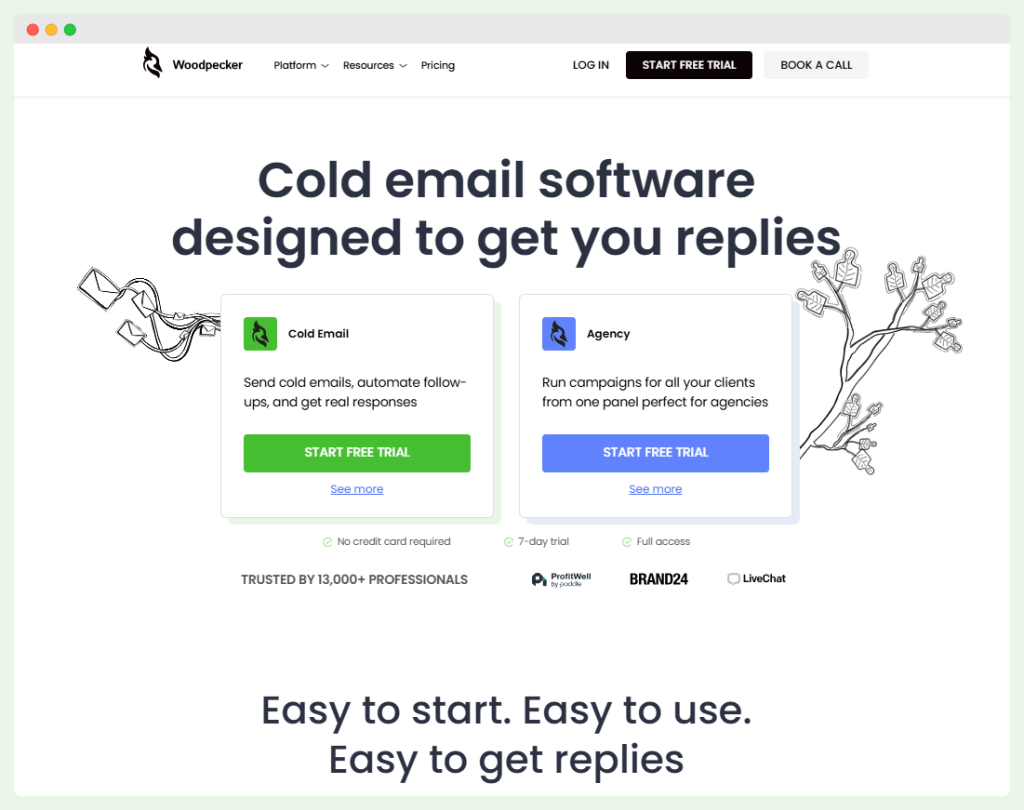
If simple scheduling isn’t enough for you, and you are looking for an advanced tool with features like email tracking, meet Woodpecker.

To schedule emails in Woodpecker, select the option “Use prospect’s timezone if available” in your campaign settings. This feature allows Woodpecker to automatically schedule your emails according to your prospects’ time zones.
In this way, your messages will be sent at the optimal times for engagement.

Find out more about scheduling emails using your prospect’s timezone.
Plus, Woodpecker’s adaptive sending option automatically adjusts daily sending limits to prevent emails from being flagged as spam. It also has human-like sending randomization, so your emails feel natural, just like they’re being sent manually.
Another Woodpecker benefit is that it helps you stay organized while running multiple campaigns. You can sort emails into folders, set up condition-based follow-up campaigns, and even test different messages with A/B testing.
And, of course, Woodpecker integrates with platforms like Google Calendar and your CRM for a smoother workflow.
Do more than just schedule emails – with Woodpecker.
Common myths about email scheduling
While scheduling emails is a standard feature now, some persistent myths confuse how it works.
Let’s clear up these misconceptions.
Myth 1: Scheduled emails are sent immediately once scheduled
Many users assume the scheduled message will be sent immediately once it’s set, but this isn’t true.
When you schedule emails to send at a particular time, they remain in the draft or scheduled mail folders until the specified time arrives.
Myth 2: You can only schedule emails on a computer
Email scheduling was once limited to desktop versions but is now widely available on mobile devices.
For instance, the Gmail mobile app lets you schedule messages directly from your Android phone or iPhone.
Myth 3: Scheduled emails don’t appear in your mailbox until they’re sent
When you schedule an email, it remains visible in a special folder within your mailbox. The folder is often labeled as “Scheduled”, “Outbox”, or “Sand Later.”
You can edit, reschedule, or delete the email at any time before the scheduled date.
Master email scheduling
A scheduled email can be a powerful tool for managing communication and enhancing recipient engagement. Use scheduling options to reach your audience strategically, personalize each message to boost open rates, and proofread every email before sending.
If you need any assistance, reach out to Woodpecker.
It makes email scheduling super easy and precise, giving you full control over when your emails go out.
Try Woodpecker and improve your scheduling.

