Dear users, have you ever gone crazy while trying to manage your prospect base in Woodpecker? If so, you should keep reading. Lately we’ve introduced some massive improvements into Woodpecker‘s interface to improve the UX. Now our users can easily and safely add, manage, and delete their prospects’ data. Here’s what’s new and how it’s better than before.
Add prospects – totally refreshed
There have been some major changes in the process of adding new prospects to your database in Woodpecker. Now you have 3 distinctly separated ways to add prospects to your campaign:
- import
- manually
- from database
How to do this now?
You will see the three options when you click on the Add prospects button in your campaign overview or in campaign editing mode, as well as in the campaign overview (to allow you easily add new prospects to a running campaign).

Just choose one of the 3 options and follow the further steps to add new prospects. At the end of each of the ways, just click ADD and be sure what data you’re adding at the moment and how many prospects will be added. Check below what each of the three ways looks like.
Import
Click on Add prospects ->Manually. From this point, the path hasn’t changed very much. To see how importing prospects from .csv works in Woodpecker, go to Quickstart Guide Vol 1.
There’s one new helpful thing here, though. Sometimes a few of the records in your database may include errors (usually wrong format email addresses).
Woodpecker won’t import a contact if there’s something wrong with their email address. And now in the import summary, you’ll be able to download all the identified Errors to correct the wrong format email addresses in a .csv and eventually add them to your campaign. Sometimes it’s as little as lack of a dot.
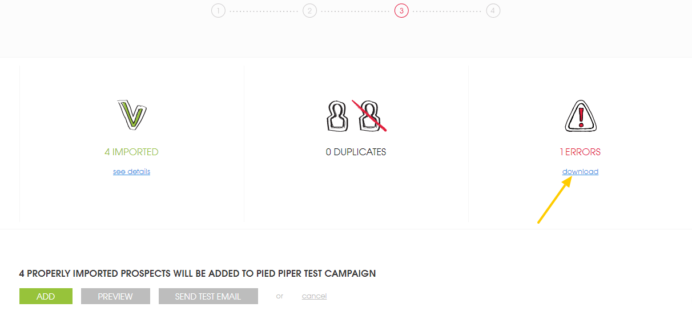
What a bummer it would be to lose a sales opportunity due to lack of a stupid dot, wouldn’t it? That’s why we want our users to be able to easily find and correct such errors in their contact base.
Manually
It’s not a very common way of adding prospects to Woodpecker, but it’s useful if you want to add just a few special prospects to your campaign.
To do that, you just pick Add prospects ->Manually, and you’ll be able to edit a spreadsheet similar to the Google or Excel one. You just type in the prospects’ data (only email required), and press Enter or Tab to go to the next column. As you type in your prospects’ data, click ‘Add’ below the table to add the prospects to your campaign.
This one may be especially handy when testing Woodpecker. If you haven’t done that yet, you can sign up for a 14-day trial right now.
From database
If you already have some prospects previously uploaded to your general Prospects database in Woodpecker, you can pick some contacts from there while creating your campaign.
Firstly, you of course pick Add prospects -> From database. Next, you’ll see the familiar spreadsheet with all your previously uploaded prospects’ data (but only of those prospects who are not in your campaign yet).
To add them, you just tick them on the list and click ‘Add’ right under the spreadsheet.
That’s the three ways for adding new prospects’ data to your campaigns in Woodpecker. But that’s not the only feature we’ve improved. Here comes the refreshed database spreadsheet.
Manage prospects
If you’ve been working on Woodpecker‘s prospect spreadsheet before, you know that there was a lot to improve in terms of user experience. You really might want to play with the spreadsheet now.
Refreshed prospects spreadsheet
From the very beginning, we wanted the spreadsheet to have the Excel-like look and feel. We knew lots of cold email senders work on spreadsheets, and the table was to provide the familiar experience. But our table initially wasn’t as flexible as the well-known spreadsheets.
Now the table transformed. A lot. Here’s what you can do in Woodpecker‘s contact base spreadsheet at the moment:
- hide the columns you don’t need to see
- adjust the width of the columns (grab the frame and pull or double click on a cell to auto-adjust to the content)
- change the order of the columns with drag-and-drop
- sort the rows according to a chosen column (click on the column label)
- spread the table for the full screen width (especially helpful if you work on a bigger screen and like to see all the columns at once)
- conveniently search for specific prospects
All those little touches make the spreadsheet much more flexible and significantly more convenient to use.
Additionally, right from the prospects spreadsheet, you can quickly:
- jump to the overview of the campaign a chosen prospect has been in,
- and see all the emails the prospect already got.
To do that, just click on the number in the column called “In Campaign”

Delete prospects
Yes, you can finally delete prospects from your campaigns and the main Prospects list in Woodpecker.
It took us almost 1,5 year to implement this “basic” function. We know that the lack of this function seemed counter-intuitive. However, you need to know that deleting prospects had to be analyzed in and out between we decided to add the function. We needed to take into account each and every corner case of deletion and its consequences for our users.
Our main concern here was your reputation as email senders. Deleting prospects without necesarry precautions could result in you sending emails to people who in fact shouldn’t get messages from you. That’s why it took us so long to add this function – because we really struggled to make it as safe for you as possible.

For more details and a step by step tutorial for deleting prospects, go to this article in our help section.
New design of all alerts
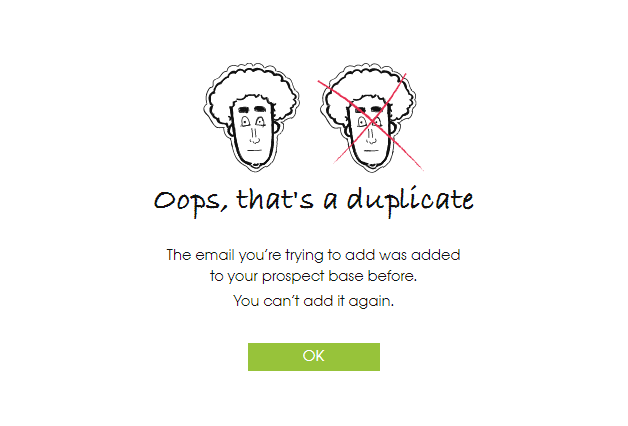
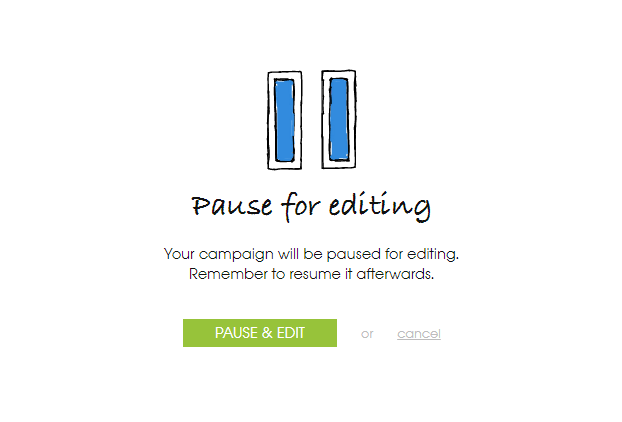
And last but not least, all Woodpecker alerts have been finally dressed up in new designs. We wanted to make them fun for you. Hope you’ll like them. Here’s a sneak peek for just a few examples.

If you want to see them all, sign up here:
Any thoughts?
There’s one thing that still hasn’t changed in Woodpecker: we’re still open for all kinds of feedback. Please let us know your thoughts on the improvements. There are at least three ways to do that:
- For people in a hurry: leave a comment right under this post
- For tradition lovers: drop us a line at [email protected]
- For social media beasts: tweet to us @Woodpeckerapp
Pick the one that describes you the best and share your impressions.
READ ALSO

How to Sync Woodpecker’s Prospect Base with Your CRM and Other Apps
This week, Woodpecker successfully finalized integration with PieSync. As our users, you've just got the ability to effortlessly sync your CRM contact base (or contacts you store in other cloud applications) with your prospect base in Woodpecker. In other words, you can now regain all the time spent on importing prospects and exporting leads back and forth between Woodpecker and other apps that you are using to manage your sales processes.

Find a CRM That Works Great With A Cold Emailing Tool (Quick Guide)
How to streamline your sales communication? Sync your cold emailing tool with a customer relationship management solution (CRM). It will result in fast and relevant communication with your prospects. Yet, with all those tools on the market, how to choose one that suits your needs? Woodpecker integrates with tools, like Pipedrive or Teamgate, but I reached out to Kashyap from Salesmate.io to tell me how to decide which CRM to pick and how to assess its compatibility with a tool like Woodpecker. You can take it from here, Kashyap.

15+ Places Where You Can Find B2B Leads, Other than LinkedIn
If someone made a list of the "most commonly used sources of b2b leads", LinkedIn would be undisputable #1 on that list. And that's understandable. LinkedIn is a mine of information about businesses and people connected with those businesses. But there are also other platforms including collections of companies, divided into categories, where you can find ideal prospects along with some reference points for your cold email campaigns. Here are 15 places on the web where you can find SaaS companies, startups, software houses, marketing experts and other companies that will match your Ideal Customer Profile.

