
Since we released the new A/B testing feature, it’s become the easiest and most convenient way to carry out a split test of your cold email copy in Woodpecker. However, if you wish you can still do it manually. Let me show you how to do it in a quick and simple way.
Step 1: Decide what to test
As I pointed out in my previous post, we need to test one element at a time to be sure which alteration brought an increase (or decrease) in our cold email efficiency. So the first step is to decide which part we’re going to test.
Following my previous example, I focus on the subject line just to show you how to use Woodpecker to carry out split tests. But please know that any part of the message can be tested the same way.
Step 2: Create the versions of copy
So our two example subject lines are:
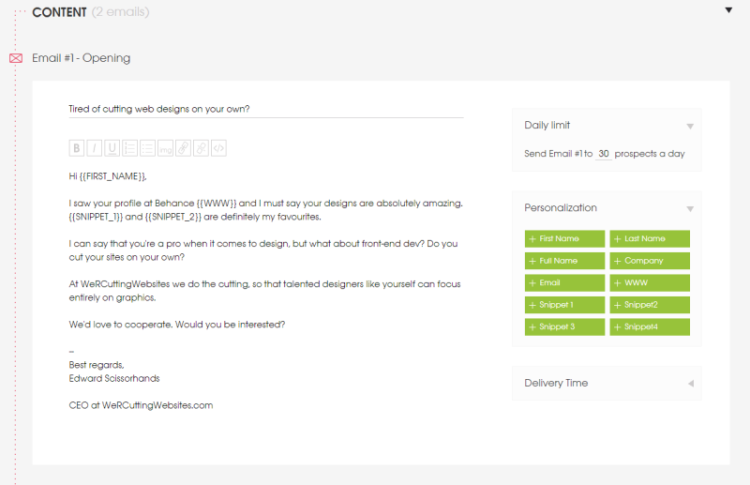
Version A: Tired of cutting web designs on your own?
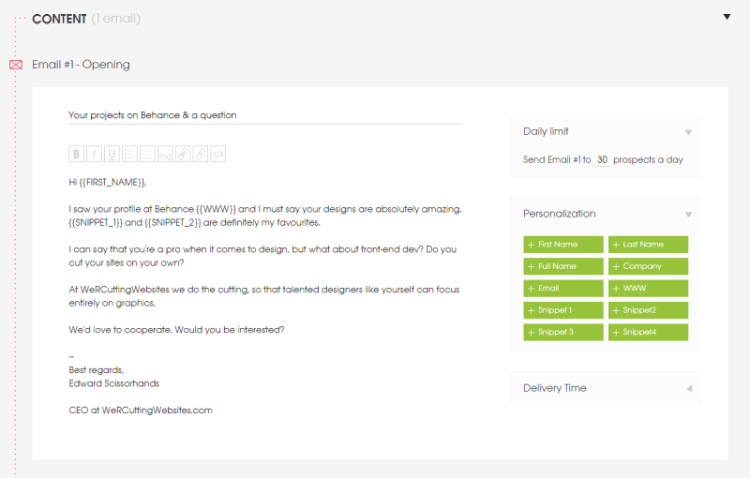
Version B: Your projects on Behance & a question
And the other elements of our email: the from line, the whole body of my email, the signature are exactly the same in the two versions.
So it looks like this:
Version A
Version B
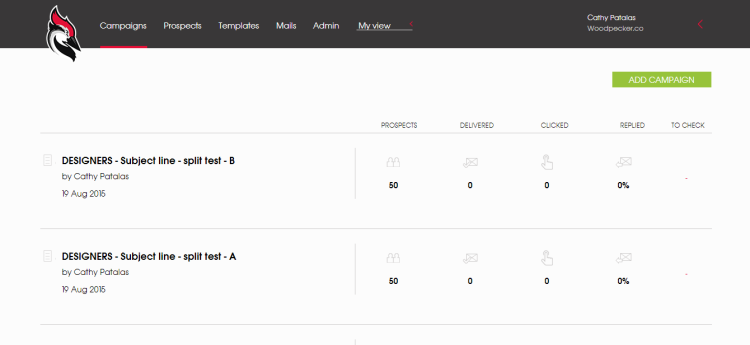
Step 3: Create two separate campaigns in Woodpecker
This way, we’ll be able to easily compare the stats of our two versions of email copy – or, in other words, we’ll be able to compare the effectiveness of our two subject lines.
The two campaigns should include the same number of prospects. I included 50 prospects in each of my two examples, but it can be more than that if you have a bigger contact base at your hand. Plus, the prospects should be from the same target group. This way, our two test groups are homogeneous (I explained what it means and why it’s so important in the previous post).
Step 4: Synchronize the delivery times of both campaigns
Except for the almost identical copy, the delivery times should be set for exactly the same days and hours – as that can also influence the effectiveness of our outreach.
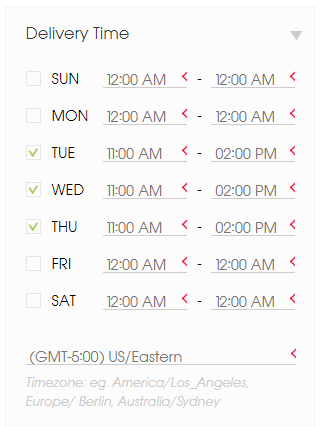
You can set the day of the week and the time frame for delivery of both the opening message and follow-ups in Woodpecker. Find the Delivery Time box on the right, right next to the copy of your messages.
Step 5: Start sending and control the results
We’re able to compare the most important statistics on the Campaign List. But if we need more detailed data and all the numbers, we can view the stats of each campaign separately. And it looks like this:
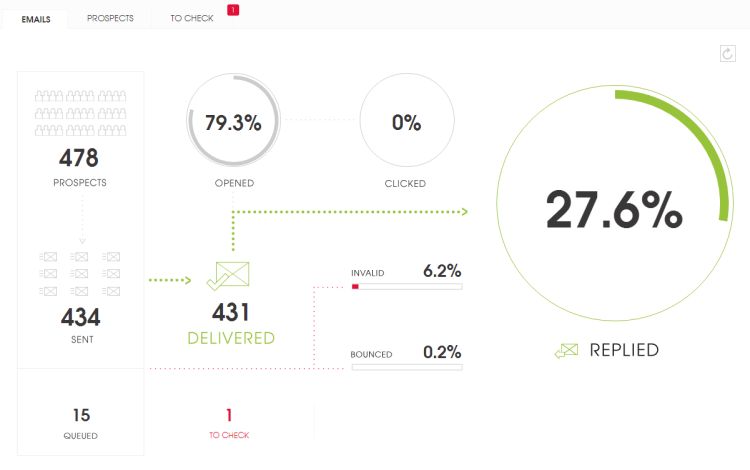
Remember that we’re testing efficiency, so the most important factor we want to pay attention to is the number of replies – or even more specifically: the number of positive replies. The next thing we can control, especially when testing various subject lines, is the open rate.
Step 6: Interpret the results and choose the better version
The numbers tell us how our message is doing. The key is to interpret them the right way. So let’s consider some possibilities:
A) The open rate and the reply rate of one version are considerably higher than the other.
This one’s easy – we choose the one which works better. That’s a dream scenario. We can keep testing the subject line by switching the worse version with another one. Or, if the open rates are fine, but the reply rates are low – we can move on to testing another part of our email.
B) The open rates are high for both versions (around 75-90%), but the reply rates are low (10% or less).
That’s probably the problem with the following parts of our email (or the preceding part – the from line). In such a case, we choose the better version of our subject, and we create two versions of another part for further tests.
C) The open rates and the reply rates for both versions are low.
That’s the worst case scenario. But it happens. If something like this comes out, we shouldn’t be upset. That’s just a sign we should keep improving our copy. So what we do in such a case is come up with another two subject lines to test. If that doesn’t work either, it means there’s something wrong with the other element(s) of our message. And we keep testing step by step. One part at a time.
What’s in it for you
Hope this practical approach gives you an idea of how you can manually carry out split tests of your cold email copy in Woodpecker. That’s a good start. Once your opening message is mastered, you can move on to A/B testing your follow-ups as well.
Usually, follow-ups bring higher response rates just because they’re follow-ups. That’s why it’s so important to send follow-ups to those who didn’t reply to your opening message.